
Why Choose a Bubble Pendant Lamp for Your Space?
A Bubble Pendant Lamp can soften a room without hiding its structure. Its rounded shade diffuses light, while the suspended form draws the eye above a dining table, reading chair, or quiet corner. The effect depends on scale. A small fixture may disappear over a long table; an oversized one can crowd a low ceiling. Measure the space, check the hanging height, and consider how the lamp looks when switched off. These details matter.
There is history behind the silhouette. George Nelson’s design studio introduced the original Bubble Lamp in 1947. Nelson is often credited with the phrase, “Design is a response to social change”—a useful lens for understanding why practical, inviting forms endure. Energy use matters, too. The U.S. Department of Energy’s Energy Saver guidance says LED bulbs use up to 90% less energy than incandescent bulbs and can last up to 25 times longer. That does not guarantee a good result: check the fixture’s socket, dimmer compatibility, and recommended bulb type before buying. A bright bulb can flatten the soft look; a warm, dimmable LED may suit it better. Still, style is not performance. A glass shade can glare, and a fabric-like finish may collect dust. Small compromises. This guide weighs appearance, light quality, scale, and upkeep to help you decide whether a Bubble Pendant Lamp belongs in your space.
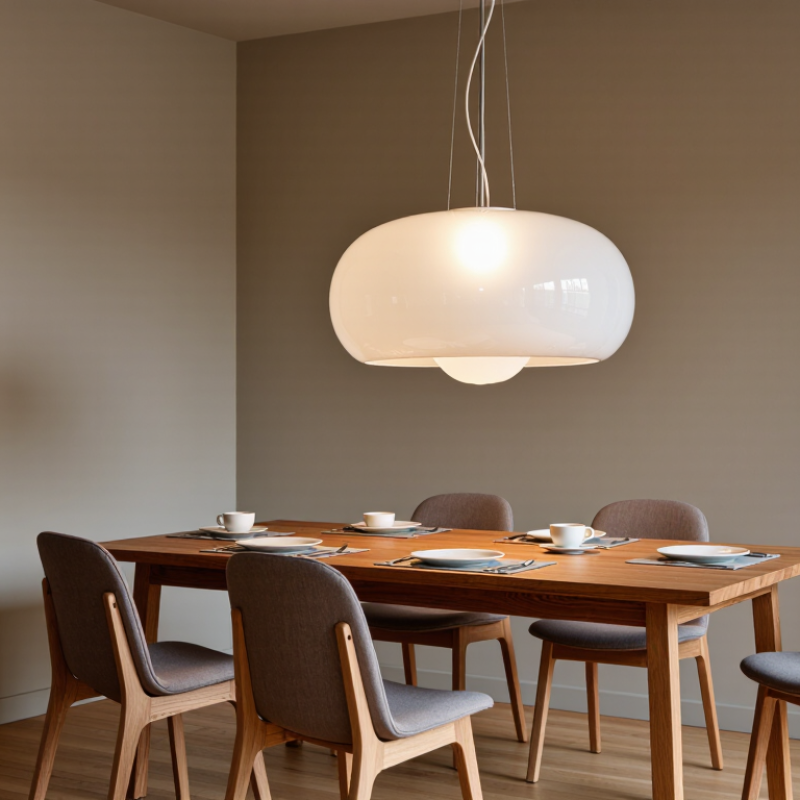
Definition and Optical Design of Bubble Pendant Luminaires
A bubble pendant luminaire is a hanging fixture built around one or more spherical shades, often made from clear, frosted, or opal glass. Its defining feature is the globe: it softens the lamp’s outline while shaping how light spreads across a room. Clear glass reveals the light source and creates sharper reflections. Frosted glass scatters light more evenly, though it can look less crisp.
Optical design depends on globe size, glass finish, spacing, and bulb position. A cluster of small spheres can create overlapping highlights on a dining table, while a single broad globe often gives a calmer pool of light. Still, a clear globe can feel harsher than expected. That matters. Check the bulb from seated eye level, not just from the doorway. The International Energy Agency reports that lighting accounts for about 15% of global electricity use, making efficient light sources relevant beyond appearance. The U.S. Department of Energy says LEDs use at least 75% less energy than incandescent lighting. Pairing an LED with suitable brightness and color temperature helps preserve the fixture’s visual effect without excessive energy use. A dimmer can add control, but only when the bulb and dimmer are compatible.
How Globe Count and Glass Finish Shape Light Distribution
A bubble pendant’s globe count changes how light overlaps. Three closely spaced globes can create a brighter central pool, while wider spacing spreads light across more of a table. More globes do not automatically mean better coverage; bulb output, pendant height, and globe diameter matter too. The Illuminating Engineering Society’s LM-79-19 standard measures both total luminous flux and spatial intensity distribution for solid-state lighting products. That distinction is useful: a lumen total alone cannot show where the light lands. Small detail. Big effect.
Glass finish shapes the result. Clear glass exposes the bulb and can produce sharp highlights on a countertop. Opal or frosted glass softens the source, reducing glare and blending shadows, though it may also make the pendant feel less bright. The U.S. Department of Energy reports that LEDs use at least 75% less energy than incandescent lighting. That efficiency can make dimmable bulbs a practical choice, but it does not guarantee comfortable light. I would compare beam spread and diffuser appearance in person when possible; online photos often hide glare. For a dining table, look for even illumination across the surface, not just a bright spot beneath the center globe.
Why Choose a Bubble Pendant Lamp for Your Space?
How globe count and glass finish shape light distribution
The chart illustrates how adding globes can increase overall light output, while opal glass tends to spread light more evenly than clear glass. Values are an illustrative relative-light model, not laboratory measurements; actual results depend on bulb output, shade design, and installation.
Selecting Fixture Scale and Hanging Height for Each Room
A bubble pendant draws the eye through its clear globes, so its size matters as much as its light. Above a dining table, a single pendant often looks balanced at about one-third of the table’s width. For a cluster, check the full canopy and globe spread, not just one glass sphere. Leave roughly 30–36 inches between the table and the lowest globe; this common residential range keeps the fixture visible without crowding seated diners. IES guidance emphasizes matching light to the task and the room, rather than choosing a fixture by appearance alone (IES, The Lighting Handbook).
In a kitchen, measure the island before choosing a cluster. Several globes can span the island without each one needing to be large. Keep the lowest point about 30–36 inches above the countertop, then check sightlines from nearby seats. Too low feels crowded.
In a bedroom or living room, a bubble pendant may work better as ambient lighting, with separate task lighting for reading or food preparation. I still find that clear glass can look smaller in a showroom than it does above a dark table. Bulb output matters, too: the U.S. Department of Energy’s Energy Saver guidance reports that LEDs use at least 75% less energy and last up to 25 times longer than incandescent bulbs. Pick the scale in the actual room, not from a product photo.
LED Efficiency: The U.S. DOE Reports at Least 75% Energy Savings
Why Choose a Bubble Pendant Lamp for Your Space?
A bubble pendant lamp can bring soft, rounded shapes above a dining table or into a quiet reading corner. Its glass spheres catch daylight and spread the fixture’s glow across nearby surfaces. But the decorative shape does not determine energy use. The light source does.
The U.S. Department of Energy’s Energy Saver guidance reports that LED bulbs use at least 75% less energy and last up to 25 times longer than incandescent bulbs. Those figures make an LED-equipped pendant a practical choice for rooms where lights stay on for hours. Still, the actual savings depend on usage, bulb output, and fixture design. A dark or heavily tinted shade may make a room feel dimmer, prompting people to use more light. Check lumens for brightness, and confirm that the bulb works with the fixture’s dimmer, if included. I would not treat the percentage as a guaranteed bill reduction; it describes the technology’s comparison with incandescent lighting.
Tips: Choose a warm-white LED for a relaxed dining area. Check the bulb’s dimensions before buying. Small detail, but easy to miss.
Installation Checks: Safety Listing, Dimming, and Bulb Compatibility
A bubble pendant can soften a dining nook or add a focal point above a kitchen island. Before buying, check the fixture’s safety listing and confirm it is recognized for your region. The label should match the installation instructions, not just the product photo. Note the pendant’s weight, too. A glass shade can be heavier than it looks, so make sure the ceiling box and mounting hardware can support it. If the wiring or support is unclear, ask a qualified electrician.
Dimming needs a little more checking. The pendant, dimmer, and bulbs must work together; a dimmable bulb alone does not guarantee smooth dimming. Check the bulb type, base, maximum wattage, and any guidance about enclosed shades. Bubble glass can make a bulb visible, so shape and brightness matter as much as fit. It is easy to overlook glare when shopping from a screen. I’d review the bulb choice in the actual room before settling on it.
Tips: Turn off power before any inspection. Match the bulb’s base and wattage to the fixture label. Test dimming at low and high settings, and watch for flicker or buzzing. If the instructions leave you guessing, pause and get help. That extra check is worth it.
| Installation Check | What to Verify | Why It Matters | Practical Check |
|---|---|---|---|
| Safety listing | Look for a safety certification appropriate to the installation location and accepted by the local authority. For damp locations, confirm the fixture is specifically marked for that use. | Certification indicates the product has been evaluated against applicable safety requirements. A dry-location fixture is not automatically suitable for bathrooms or other damp areas. | Check the fixture label and installation instructions; ask the local building authority or a qualified electrician if the marking is unclear. |
| Ceiling support | Confirm that the ceiling outlet box and mounting hardware are rated to support the complete fixture’s weight. | A pendant places its weight on the ceiling connection. Decorative ceiling finishes alone may not provide adequate support. | Use the specified mounting bracket and suitable structural support. Have an electrician assess an uncertain or damaged outlet box. |
| Electrical connection | Check the fixture’s wiring diagram, grounding requirements, supply voltage, and local electrical rules. | Correct wiring and grounding help reduce the risk of electric shock, overheating, or malfunction. | Turn off power at the circuit breaker and verify the circuit is de-energized before work. Use a qualified electrician when wiring is unfamiliar. |
| Dimming | Both the bulb and the dimmer must support dimming and be compatible with each other. Check the dimmer’s supported bulb type and minimum and maximum load. | An incompatible combination may flicker, buzz, fail to dim smoothly, or shorten component life. | Consult the bulb and dimmer instructions. If using multiple LED bulbs, ensure their combined load falls within the dimmer’s stated range. |
| Bulb base and wattage | Match the bulb base and voltage to the fixture label, and never exceed the fixture’s maximum permitted wattage. | A bulb with the wrong base will not fit correctly; excessive wattage can create unsafe heat. | Read the socket or fixture label before buying a replacement bulb. Do not rely on appearance alone to identify the base. |
| Bulb size and clearance | Check the permitted bulb shape and dimensions, along with clearance inside the glass or shade. | A bulb that is too large may not fit, may touch the shade, or may affect heat dissipation. | Compare the bulb’s dimensions with the fixture instructions and make sure the bulb does not contact the shade. |
| Enclosed-fixture rating | If the bulb is surrounded by a closed or mostly enclosed shade, verify that the bulb is rated for enclosed fixtures. | Heat can build up in enclosed spaces and may reduce bulb life or create an overheating risk. | Check the bulb packaging or technical information for an enclosed-fixture statement; follow any fixture-specific restrictions. |
| Final inspection | Make sure the fixture is secure, all connections are covered, and the glass elements are correctly seated before restoring power. | A final check can help identify loose parts or exposed wiring before the lamp is used. | Restore power only after installation is complete. If the lamp flickers, smells hot, or makes unusual sounds, switch it off and investigate. |