How to Choose the Best LED Light Kit?
Choosing the best LED light kit starts with the work it must do. A portrait setup needs flattering, controllable light; a product table needs even coverage and accurate colour. The International Energy Agency estimates that lighting accounts for roughly 15% of global electricity consumption. That scale makes efficiency worth considering, but low power use alone does not guarantee good results. Not quite.
Compare usable brightness, colour accuracy, colour temperature range, dimming, and heat management. Check whether the manufacturer provides measured output and colour-rendering data, rather than relying on vague claims such as “professional grade.” The U.S. Department of Energy’s solid-state lighting research highlights efficacy, thermal performance, and lifetime as important areas for LED evaluation. For a kit, those qualities become practical: Can the lamp maintain output during a long shoot? Does its colour shift when dimmed? Will its stand stay steady on a small desk?
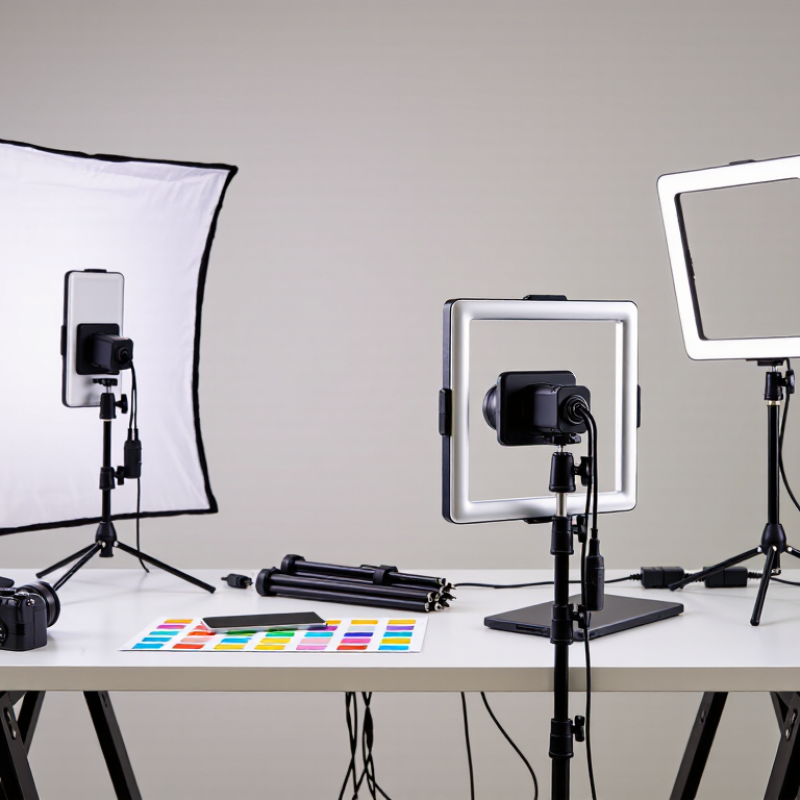
A specification sheet is only part of the decision. Read independent reviews, confirm what comes in the box, and check the return policy. A softbox, power adapter, or sturdy mounting bracket can matter more than a dramatic headline lumen figure. Also consider where the kit will live. A compact panel may suit a cramped workspace, while two adjustable fixtures can make product shadows easier to control. No single setup fits every user. Some published figures also lack consistent testing conditions, so treat them as clues, not promises. The best LED light kit is the one that produces dependable light for your actual space, budget, and tasks.
Define the Kit’s Purpose and Required Light Output in Lumens
Before comparing LED light kits, decide what they need to illuminate: a desk, a workbench, or an entire room. The U.S. Department of Energy distinguishes lumens, which measure visible light output, from watts, which measure power use. That makes lumens a better starting point than wattage when comparing brightness. IES guidance commonly places routine office tasks around 300–500 lux at the work surface. Lux means lumens per square meter, so a small close-up task may need less total output than a broad, distant scene. Details matter.
Estimate the area, then consider how far the lights sit from the subject and whether walls or diffusers absorb light. A rough calculation is target lux × area in square meters; the kit may need more output because not all emitted light reaches the target.
For a 2-square-meter work surface at 300 lux, that is about 600 lumens reaching the surface—not necessarily the kit’s rated output. Check whether the specification lists total lumens or output per fixture.
Also consider dimming: extra headroom can help, but too much brightness creates glare and harsh shadows. There is no perfect universal number. I would test the setup at the actual working distance; manufacturer ratings do not always predict how a room feels.
Compare Luminous Efficacy in lm/W, Not Wattage Alone
How to Choose the Best LED Light Kit?
Compare Luminous Efficacy in lm/W, Not Wattage Alone
Wattage tells you how much electrical power a light uses. It does not tell you how much visible light it produces. For that, compare luminous efficacy, measured in lumens per watt (lm/W). A higher figure generally means more light for each watt consumed. For example, a 20-watt kit rated at 100 lm/W produces about 2,000 lumens. A 30-watt kit at 60 lm/W produces about 1,800. More watts do not automatically mean a brighter or more efficient choice.
Check that the figures describe the complete fixture, not just its LED chips. Drivers, lenses, and heat management can affect real-world output. Compare kits with similar color temperature and color-rendering performance, too; a high lm/W rating alone cannot show whether colors look natural or light reaches the work surface evenly. Look for test details from the manufacturer, and treat unclear figures cautiously. I still find it easy to over-trust one number.
Tips: Compare lumens and lm/W together, then check beam spread for your room. A narrow beam may brighten one countertop while leaving nearby corners dim. Consider dimming, mounting height, and heat buildup. If possible, test the kit in the actual space; specifications cannot fully predict how the light will feel there.
Choose Color Quality: CRI 80+ for General Use, 90+ for Critical Tasks
CRI is a useful first filter when comparing LED light kits. An 80+ rating generally suits garages, hallways, and everyday workbench lighting, where exact color matching is not essential.
Short answer. For paint inspection, product photography, makeup, or color-coded wiring, choose 90+ CRI when available. Subtle reds, browns, and skin tones are easier to judge.
This threshold is a practical buying guide, not a guarantee of perfect color. The light spectrum and room surfaces still affect what you see.
The CIE general CRI method, described in CIE 13.3-1995, uses eight standard color samples for its Ra score. That’s a small set. IES TM-30-20 evaluates 99 color samples and reports fidelity (Rf) and gamut (Rg), offering a broader view of color rendering. If a kit lists only CRI, ask for its TM-30 data sheet or compare a familiar fabric under the light. A red shirt can look convincing in a shop and dull at home. That happens. A useful real-world check is to judge the kit under the actual task; color perception is rarely as tidy as one score.
Match Color Temperature and IP Rating to the Installation Environment
Choosing an LED light kit starts with the room’s actual conditions, not just the look you want. Color temperature, measured in kelvins, changes how surfaces appear. Around 2700K to 3000K gives living areas a warm, relaxed glow. A 4000K setting looks more neutral and can suit workbenches or utility rooms. Cooler light may reveal details, but it can make a small room feel stark. Check a sample after dark. Daylight can fool you.
The IP rating matters wherever dust or moisture is present. Its first digit indicates protection from solid particles; the second indicates water resistance. A dry bedroom usually needs less protection than a kitchen backsplash or covered patio. For exposed rain, choose a kit rated for the conditions, and check that connectors and power components have suitable protection too. Small detail, big impact. An IP rating does not make every installation suitable for immersion. I would also inspect the mounting surface: condensation, grease, or rough wood can affect both adhesion and reliability. Check the whole run. I would still test a short section before fitting the full length; color can look different against tile, painted walls, or dark cabinetry.
How to Choose the Best LED Light Kit? - Match Color Temperature and IP Rating to the Installation Environment
| Installation Environment | Suggested Color Temperature | Typical IP Rating to Consider | Selection Guidance |
| Dry living rooms and bedrooms | 2700–3000 K | IP20 | Choose warm white for a relaxed atmosphere. IP20 is generally suitable where the fixture is protected from moisture and dust. |
| Kitchens and general indoor work areas | 3000–4000 K | IP20; consider IP44 near occasional splashes | Use 3000 K for a warmer look or 3500–4000 K for a cleaner task-lighting appearance. Keep fixtures away from direct water unless rated for it. |
| Bathrooms and other damp indoor locations | 3000–4000 K | IP44 or higher where splashing is possible | Check the required rating for the fixture’s exact bathroom zone and local electrical regulations. Some locations require higher protection, such as IPX7 in an immersion zone. |
| Covered porches and sheltered outdoor areas | 2700–4000 K | IP44 | Match the color temperature to the desired appearance. Confirm the fitting is suitable for outdoor use, including expected condensation and wind-driven moisture. |
| Outdoor areas exposed to rain | 3000–4000 K | IP65 | IP65 enclosures are dust-tight and protected against water jets under specified test conditions. Check that cable entries and connections maintain the required protection. |
| Garages, workshops, and utility areas | 4000–5000 K | IP20 for dry spaces; IP54–IP65 where dust or water is present | Neutral-to-cool white can help with detailed tasks. Select the rating based on actual dust and moisture exposure rather than the room name alone. |
| Areas cleaned with strong water jets | 4000–5000 K, depending on the task | IP65 or IP66, as required by the exposure | IP66 provides protection against powerful water jets. Neither IP65 nor IP66 means the product is suitable for continuous immersion. |
| Underwater or submerged installations | Choose according to visibility and the desired effect | IP67 or IP68, as specified for the installation | Verify the permitted depth and duration in the product documentation. IP68 conditions are agreed and specified by the manufacturer; the rating alone does not define a universal depth. |
Important: An IP rating describes protection against solids and water ingress, not overall product quality. For LED kits, check the rating of the complete installed system—including the light, power supply, connectors, and cable entries—and follow local electrical requirements.
Verify Lifetime Claims Using LM-80 Data and TM-21 Projections
When choosing an LED light kit, treat lifetime as a test-backed estimate, not a calendar promise. Request the LM-80 report and check the tested LED package, drive current, and temperature. IES LM-80-21 specifies at least 6,000 hours of maintenance testing; longer datasets, such as 10,000 hours, offer more evidence. Look for the actual measurements, not just “50,000-hour life” on a box. Details matter.
Then check the TM-21 projection and its assumptions. IES TM-21-19 uses LM-80 data to estimate lumen maintenance, but qualifying projections are capped at six times the measured test period. So a 10,000-hour dataset cannot, by itself, substantiate an unlimited 100,000-hour claim. A projection is not a warranty. The U.S. Department of Energy’s 2019 report, LED Luminaire Lifetime: Recommendations for Testing and Reporting, also distinguishes LED-package lumen maintenance from whole-luminaire reliability. Drivers and heat management can change real-world performance. Ask whether the kit’s driver and housing were evaluated, too. A warm metal enclosure after an hour is worth investigating, though touch alone cannot measure junction temperature. I would still compare the test conditions with your intended use; that part is easy to overlook.
How to Choose the Best LED Light Kit?
Verify Lifetime Claims Using LM-80 Data and TM-21 Projections
The chart shows the TM-21 reporting-time limit—up to six times the LM-80 test duration when at least 20 samples are tested. These are example durations and arithmetic limits, not product test results or lifetime guarantees. Check the actual LM-80 report, test conditions, sample count, and TM-21 projection; projected lumen maintenance is not a guarantee of service life.